Replacing the Mass Air Flow Sensor (MAF) sensor is a crucial step in restoring your vehicle’s engine performance. A faulty MAF sensor can lead to a variety of problems such as poor fuel efficiency, rough idling, or even engine stalling. If you’re planning to replace your MAF sensor, you’re likely wondering if disconnecting the battery is necessary. While the process of replacing the MAF sensor might seem straightforward, there are a few essential considerations to ensure a successful repair and avoid any potential complications.
In this article, we’ll explore the reasons for disconnecting the battery during the MAF sensor replacement, the steps involved in the replacement process, and other critical actions to take afterward for optimal vehicle performance.
What is a Mass Air Flow Sensor and Why Is It Important?
Before diving into the replacement process, let’s quickly cover what the MAF sensor does and why it’s essential for your vehicle.
A Mass Air Flow (MAF) sensor is a key component in your vehicle’s engine management system. It measures the amount of air entering the engine and sends this information to the Engine Control Unit (ECU). The ECU then adjusts the fuel-air mixture to ensure optimal engine performance, fuel efficiency, and emissions.
When a MAF sensor malfunctions, it can lead to several symptoms, including:
-
Poor acceleration: The engine may hesitate or feel sluggish.
-
Rough idling: The engine might idle erratically or stall.
-
Decreased fuel efficiency: The engine struggles to optimize fuel use, leading to higher consumption.
-
Check Engine Light (CEL): A faulty MAF sensor often triggers the CEL.
Replacing the MAF sensor is crucial for restoring proper engine function and preventing further damage. Now, let’s explore why you might need to disconnect the battery during this process.
Why Should You Disconnect the Battery When Replacing the MAF Sensor?
While it’s not always mandatory, disconnecting the battery is often recommended when replacing the MAF sensor. Here’s why:
1. Reset the Engine Control Unit (ECU)
When you replace the MAF sensor, the ECU must be updated with the new sensor’s data. If you don’t disconnect the battery, the ECU might still retain information from the old sensor. This can lead to inaccurate readings, causing issues such as poor performance, rough idling, or a persistent check engine light.
Disconnecting the battery for a few minutes helps reset the ECU. This ensures the new sensor is properly recognized, allowing the engine to run smoothly and the ECU to adjust the air-fuel mixture accordingly.
2. Prevent Electrical Issues
Disconnecting the battery helps avoid electrical issues during the installation process. Since the MAF sensor is connected to the engine’s electrical system, making a connection or disconnection while the battery is still connected can lead to electrical shorts or even damage to the ECU or the new sensor.
3. Safety Considerations
Disconnecting the battery ensures your safety when working with electrical components. It reduces the risk of electric shock or damaging sensitive parts within your vehicle’s engine management system.
4. Preventing Code Conflicts
After replacing the MAF sensor, it’s important to clear any stored trouble codes in the ECU. Failure to disconnect the battery or reset the ECU could result in the vehicle continuing to display error codes, such as the check engine light, even after the sensor has been replaced.
Step-by-Step Guide to Replacing the Mass Air Flow Sensor
Now that you understand the importance of disconnecting the battery, let’s go through the steps to replace your MAF sensor.
Step 1: Gather the Necessary Tools
Before you begin, make sure you have the following tools and materials:
-
A new MAF sensor
-
A socket wrench set
-
A screwdriver (depending on your vehicle)
-
A clean cloth for cleaning surfaces
-
Safety gloves and goggles
-
An OBDII scanner (for clearing codes after installation)
Step 2: Disconnect the Battery
The first and most crucial step is to disconnect the negative terminal of your vehicle’s battery. This prevents any electrical mishaps during the replacement process. Wait for about 10-15 minutes to ensure that the ECU is properly reset before proceeding with the rest of the steps.
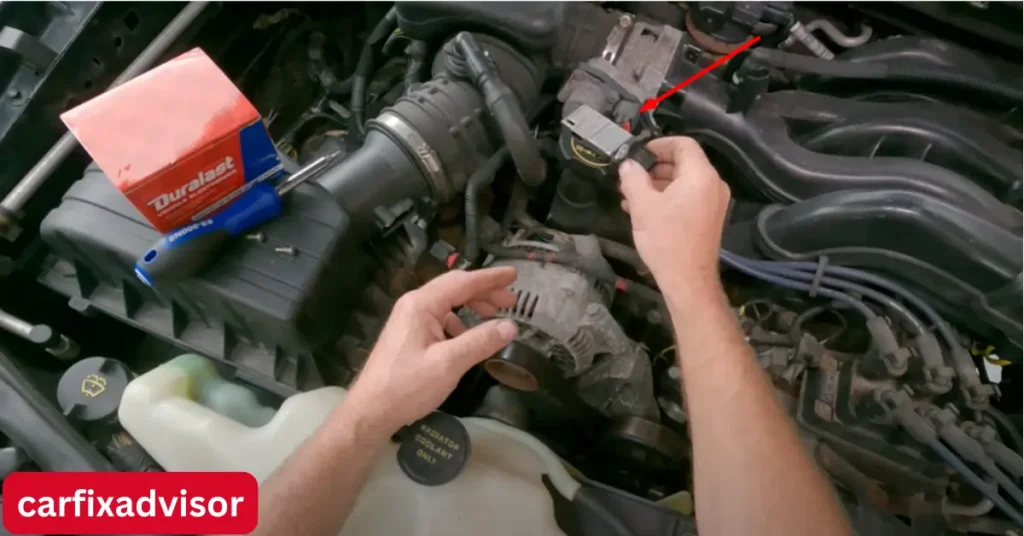
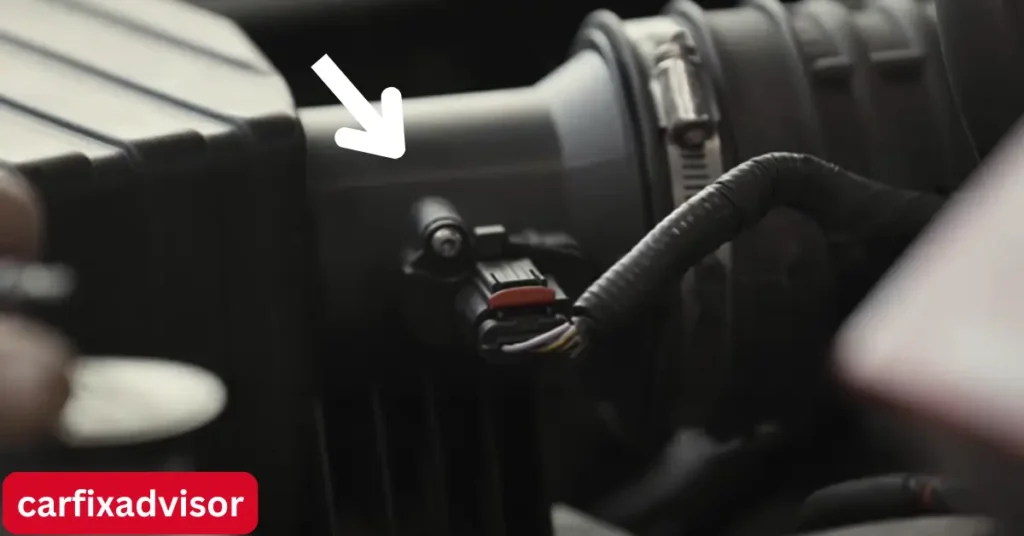
Step 3: Locate the MAF Sensor
The MAF sensor is typically located between the air filter and the intake manifold. It will be connected to the air intake system by a few screws or bolts. If you’re unsure of its exact location, refer to your vehicle’s manual for guidance.
Step 4: Disconnect the Sensor’s Electrical Connector
Once you’ve located the MAF sensor, carefully disconnect the electrical connector that connects the sensor to the vehicle’s wiring harness. This is usually a simple clip that can be gently pulled out.
Step 5: Remove the MAF Sensor
Next, unscrew or unbolt the MAF sensor from its housing. You may need to use a screwdriver or socket wrench to loosen any screws or bolts securing it in place. Once removed, compare the old sensor with the new one to ensure they match in size and shape.
Step 6: Install the New MAF Sensor
Place the new MAF sensor in the same position as the old one and secure it with screws or bolts. Make sure the sensor is seated correctly and tightly to avoid any air leaks. Afterward, reconnect the electrical connector.
Step 7: Reconnect the Battery
Once the new MAF sensor is installed and securely connected, it’s time to reconnect the vehicle’s battery. Start by connecting the positive terminal and then the negative terminal.
Step 8: Reset the ECU and Clear Error Codes
After reconnecting the battery, use an OBDII scanner to reset the ECU and clear any stored trouble codes. This step ensures that the ECU is aware of the new sensor and that any old error codes are erased.
Step 9: Start the Vehicle
Turn the ignition key to the “on” position without starting the engine. Wait for the dashboard lights to go off, and then start the engine. Listen for any unusual noises and check for smooth idling.
Step 10: Test Drive the Vehicle
Take the vehicle for a short test drive. Pay attention to how the car drives—if the performance has improved, and the engine is running smoothly, then the replacement was successful. Also, keep an eye on the check engine light; if it stays off, that’s a positive sign.
 Replacing the Mass Air Flow Sensor
What to Do After Replacing the Mass Air Flow Sensor
Once you’ve successfully replaced your MAF sensor, you might still encounter some issues or adjustments that need to be addressed. Here are a few things you can expect after the replacement and the steps to take:
1. Check for Error Codes
If the check engine light (CEL) doesn’t turn off after resetting the ECU, use an OBDII scanner to check for any remaining error codes. If there are still codes, investigate them further to ensure the installation was done correctly.
2. Look for Performance Improvements
After replacing the MAF sensor, your vehicle should experience improved acceleration, better fuel efficiency, and smoother idling. If the car still performs poorly, double-check the installation or consider whether the new sensor could be faulty.
3. Monitor Fuel Economy
A well-functioning MAF sensor ensures that the air-fuel mixture is correctly balanced, improving fuel efficiency. After the replacement, monitor your vehicle’s fuel economy. If it doesn’t improve, there may be other underlying issues with your engine that need addressing.
4. Avoid Quick Fixes
While it’s tempting to think that a quick fix can resolve a rough idle or poor acceleration after replacing the MAF sensor, remember that these symptoms could point to other issues in your engine or fuel system. It’s best to let the ECU adjust and recalibrate over a few days of driving, and if the problem persists, seek professional help.
Additional Steps After Replacing the Mass Air Flow Sensor
After replacing the MAF sensor and reconnecting your vehicle’s battery, you may think the job is done, but there are a few more important steps to ensure your car is running at its best. Here are additional steps to consider after the replacement process.
1. Road Test and Monitor Performance
Once the MAF sensor is replaced and the ECU has been reset, take your vehicle for a short road test. Pay attention to the following:
-
Smooth acceleration: Check if your car accelerates without hesitation or stuttering.
-
Idle performance: Ensure the engine idles smoothly without any rough patches or stalling.
-
Fuel economy: Monitor your fuel consumption, as a functioning MAF sensor should optimize the air-fuel mixture for better fuel efficiency.
Keep an eye on how the car handles during the road test. If everything is functioning correctly, your car should perform better than before.
2. Recheck for Codes Using an OBDII Scanner
Sometimes, even after resetting the ECU, there may still be lingering codes or issues that need to be addressed. It’s a good practice to use an OBDII scanner again after your road test to ensure that no error codes remain in the system. If the check engine light (CEL) stays off and there are no pending codes, that’s a clear sign that the replacement was successful.
3. Wait for ECU to Adapt
Modern vehicles with ECU-based systems usually take some time to adapt to the new MAF sensor. Over the next few days, the ECU will fine-tune the air-fuel mixture and recalibrate other engine parameters to accommodate the new sensor. During this time, it’s normal for the car to adjust its performance, and any minor glitches should resolve themselves.
If issues persist after a few days of driving, consider revisiting the installation to ensure everything is properly connected and seated.
4. Clean and Maintain Your New MAF Sensor
To ensure the longevity of your new MAF sensor, it’s essential to maintain it properly. Avoid touching the sensor’s sensitive parts (such as the sensing element) during installation. Additionally, periodically clean your MAF sensor, especially if you live in areas with a lot of dust or debris. Cleaning the sensor can help maintain optimal engine performance and prevent future sensor failure.
You can clean your MAF sensor with an appropriate MAF sensor cleaner, which is available at most auto parts stores. Make sure to follow the manufacturer’s instructions for cleaning to avoid damaging the sensor.
 Replacing the Mass Air Flow Sensor
Common Problems After Replacing the Mass Air Flow Sensor
Despite following the correct replacement procedure, there may be some lingering issues after replacing the MAF sensor. Here are a few common problems you might encounter and how to address them:
1. Check Engine Light (CEL) Remains On
If the CEL stays on after replacing the MAF sensor and resetting the ECU, it could indicate several things:
-
Improper installation: Ensure all connections are secure and that the new MAF sensor is seated correctly.
-
Faulty sensor: If the new sensor is defective, you may need to replace it again.
-
Unrelated issues: Other components, such as oxygen sensors, could be causing the CEL. Use an OBDII scanner to check for additional codes.
2. Rough Idling
If the car continues to idle roughly even after the sensor replacement, it could be due to:
-
Improper ECU reset: Make sure the ECU was properly reset, either through battery disconnection or using an OBDII scanner.
-
Vacuum leaks: Check for any air leaks in the intake system, as they can cause incorrect readings from the MAF sensor.
-
Fuel system issues: Problems with fuel injectors or fuel pressure may cause poor engine performance.
3. Reduced Performance or Hesitation
If your car is still experiencing poor acceleration or hesitation, there might be other underlying issues, such as:
-
Inaccurate air-fuel mixture: The ECU might not be receiving correct data, or it might need further recalibration.
-
Dirty or faulty spark plugs: Poor combustion due to dirty spark plugs can result in reduced performance.
-
Engine management problems: The issue could extend beyond just the MAF sensor. Consider having a professional diagnose the vehicle if performance doesn’t improve.
Final Thoughts: Replacing the Mass Air Flow Sensor
Replacing the MAF sensor is an important repair for maintaining your vehicle’s engine performance, fuel efficiency, and emissions control. While the process can seem straightforward, taking the time to follow each step properly is essential to avoid complications afterward.
Disconnecting the battery during the replacement process is a key step in ensuring that the ECU recognizes the new sensor and adjusts the engine’s settings accordingly. By following the steps outlined in this guide and ensuring that the sensor is properly installed and calibrated, you’ll be able to restore your vehicle’s performance and avoid common issues like poor acceleration or rough idling.
If you continue to experience problems even after the replacement, it may be necessary to consult a professional mechanic for a more in-depth diagnosis.